A feature wall can dramatically enhance the look and feel of any room, serving as a focal point that draws attention and adds character. Self-adhesive wallpaper is an ideal material for creating a stunning feature wall due to its ease of application and variety of designs. Here’s a guide to help you create the perfect feature wall with self-adhesive wallpaper.
1. Choose the Right Wall
Selecting the right wall is the first step in creating a feature wall. Ideally, choose a wall that naturally draws the eye when you enter the room. This could be the wall behind the bed in a bedroom, the fireplace wall in a living room, or the wall behind the dining table. Avoid walls with too many windows or doors, as these can interrupt the flow of the design.
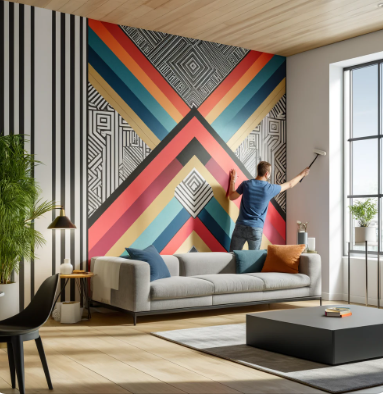
2. Select a Design
The design of your wallpaper should complement the existing decor of your room while making a bold statement. Consider geometric patterns for a modern look, floral prints for a touch of nature, or textured designs for added depth. If you’re aiming for a luxurious feel, metallic wallpapers can add a glamorous touch.
3. Prepare the Wall
Before applying the wallpaper, ensure your wall is clean, smooth, and dry. Remove any old wallpaper, fill in holes or cracks, and sand down rough areas. A well-prepared wall will help the wallpaper adhere better and last longer.
4. Measure and Cut
Measure the height and width of your wall and cut the wallpaper into strips, leaving a little extra at the top and bottom to ensure full coverage. If your wallpaper has a pattern, be sure to match the design across strips for a seamless look.
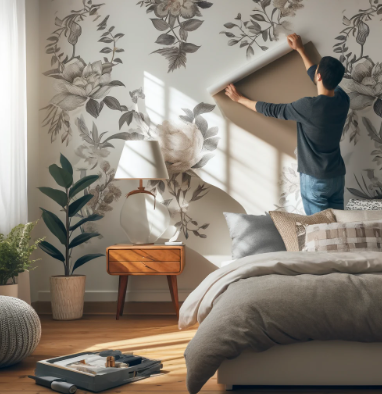
5. Apply the Wallpaper
Start applying the wallpaper from the top of the wall, gradually peeling off the backing and smoothing it down with a squeegee or smoothing tool to remove air bubbles. Work slowly and carefully, ensuring each strip is aligned correctly with the previous one. If you make a mistake, self-adhesive wallpaper allows you to reposition it without causing damage.
6. Trim Excess
Once all the strips are applied, use a sharp utility knife to trim any excess wallpaper at the top and bottom of the wall. Be sure to cut along the edges for a clean, professional finish.
7. Add Finishing Touches
After the wallpaper is in place, add finishing touches to enhance your feature wall. This could include artwork, lighting, or decorative shelves that complement the wallpaper design. These elements will help integrate the feature wall into the rest of the room’s decor.
Conclusion
Creating a feature wall with self-adhesive wallpaper is a straightforward and rewarding project that can transform your space. By carefully selecting the right wall, design, and following proper application techniques, you can achieve a professional-looking result that adds depth and character to your room. Whether you’re aiming for a bold statement or a subtle enhancement, a feature wall is a versatile and stylish addition to any home.


